Ceramic tile coasters are so easy and fun to make, and can so easy to personalize. In this post, you’ll find everything you need to make your own set of ceramic tile coasters.
This post contains affiliate links for Etsy. If you make a purchase by clicking on them, I make a small commission at no extra cost to you. Thanks for your support!
In early 2014, I started making ceramic tile coasters to sell in my EyeLoveKnots shop – at the time, this shop was for all craft related items, now it’s just for crochet patterns. I went on to make more than 100 sets of these coasters, and then published the original version of this post on my EyeLoveKnots blog back in May of 2014.
I stopped making them because 1.) they weren’t moving in my shop so I just had a lot of coasters everywhere, and 2.) they were a bit tacky on top and it drove it crazy because there had to be wax paper in between the coasters when not in use, and that just didn’t seem practical to me.
I feel like it was the perfect timing that Mod Podge Rocks started sending newsletters again because it was at the same time I started looking at this post thinking of publishing it here on On Rockwood Lane.
I know they have a lot of questions and answers on Mod Podge Rocks so I went searching for an answer to the tackiness. I found that the gloss formula just tends to be tacky, and the solution given is to add an acrylic sealer, but I was already doing this. I then found another article dedicated to sticky Mod Podge which recommended the Minwax Polycrylic sealer for coasters, and the Mod Podge Hard formula. It sparked my interest to give ceramic tile coasters another shot.
I always enjoyed making the ceramic tile coasters. They are so quick and easy to put together, and can be customized so easily too.
I’ve split ceramic tile coasters into two posts so it wouldn’t be that long. Below, you’ll find out all about the supplies you need to make your own set of ceramic tile coasters. When you’re ready, hop on over to my How to Make Ceramic Tile Coasters post for the step by step guide.
What Do I Need to Make Ceramic Tile Coasters?
The short answer is ceramic tiles, a paper product (like scrapbook paper or photos), a cutting tool, Mod Podge, a foam brush, a sealer, a scrapper of some sort (I use an old gift card), some glue and your choice of felt or cork for the underside.
What Size Ceramic Tiles Do I Need to Make Coasters?
The average size for coasters seems to be about 4″ so I recommend the 4 1/4″ or 4.25″ size ceramic tiles for coasters.
If you wanted to make a trivet, or wall art, you can use this same process for them, and purchase other sizes of tiles.
Where Can I Buy Ceramic Tiles to Make Coasters With?
You can find these at your local home improvement store. I originally got mine at Lowe’s but Home Depot is closer to me now so that’s where I get them.
Either location, the price is comparable. There are some differences I noticed that are not a big deal, but means you can’t use them both together in a set of coasters:
- ever so slight color difference
- slight thickness difference
- the underside of the tiles have a different pattern on them
I recommend purchasing at least 5 extra tiles in case there are any blemishes, chips or stains, which are common in the 3 tiles closest to the outsides of the boxes where the glue has been applied.
You might also find some ceramic tiles at your local Habitat for Humanity or thrift store – I have personally donated some to mine in the past.
What Kind of Paper Should I Use for Ceramic Tile Coasters?
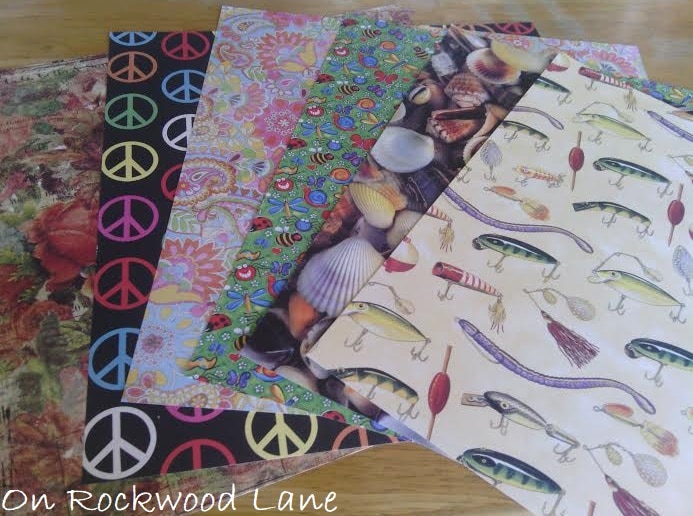
My go to for ceramic tile coasters is lightweight scrapbook paper, but you can also use plain jane computer paper as well as cardstock, and vellum. Heavier papers will require 1-2 more coats of Mod Podge.
Where Can I Buy Scrapbook Paper to use for Ceramic Tile Coasters?
I often go to JoAnn’s, Michaels and Hobby Lobby, and I find each one has different prints available.
I love shopping the aisle of open, single sheet scrapbook paper. There are so many fun prints and priced for about $0.49 to $0.69 each, it’s so easy and affordable to pick a bunch of unique patterns. You could also purchase a book of scrapbook paper for around $5 – $20. I recommend checking the ads to see when the scrapbook paper is on sale.
Can I Print My Own Images to use for Ceramic Tile Coasters?
Absolutely! It’s recommended you use a laser jet printer to avoid bleeding, but you can print photos, clip art or digital scrapbook paper to use for ceramic tile coasters.
There is a growing supply of digital clip art and scrapbook paper available for purchase online. My favorite place to browse is Etsy, but you can use digital art you create, or one of your favorite bloggers shares. Check out all my Paper Crafts Etsy Favorites for inspiration.
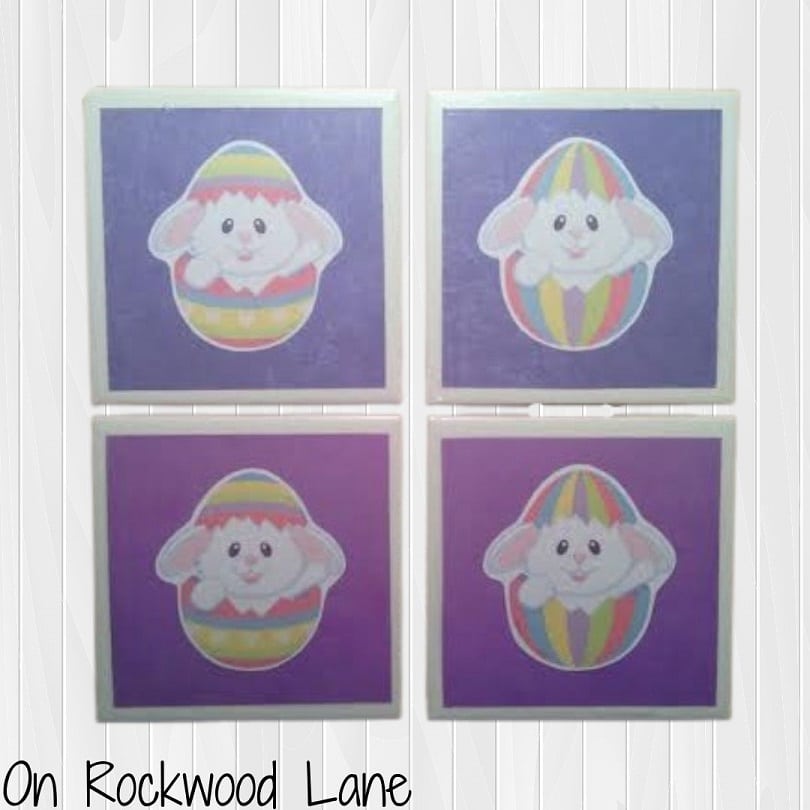
For these Easter Bunny Ceramic Tile Coasters, I purchased the bunny in the egg clip art on Etsy, cut around it, and after my purple scrapbook paper was adhered to the ceramic tile coaster, I used the Mod Podge to decoupage it right on top.
Can I Use Napkins to Make Ceramic Tile Coasters?
You definitely can. Personally, I tried once as seen in my Napkin Craft Fail, and have not tried again. I’ve seen such beautiful projects made from decoupaging napkins on though so I think it’s worth a try.
What do I need to use to Cut Scrapbook Paper for Ceramic Tile Coasters?
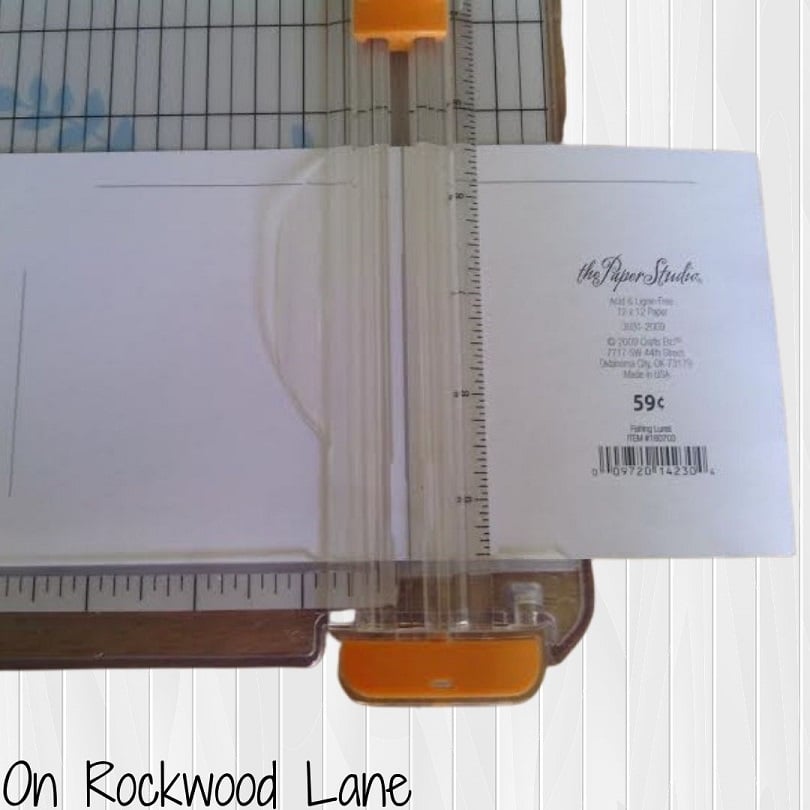
I have a small paper cutter – Fiskars SureCut Paper Trimmer – that does the job, but so-so. I got it from JoAnn’s on sale for 40% off, and that’s why I made the purchase. I also purchased during a time I was making wedding invitations so before coasters was a thought. It cuts great, however, it only have a maximum cut of 9″ when most of the papers I buy are 12″ x 12″.
You can also use plain jane scissors or a cutting machine, like a Cricut, which is on my wish list.
What Kind of Mod Podge Should I use to Make Ceramic Tile Coasters?
I started out by using Mod Podge Matte Finish. It does a great job of gluing and sealing and is so easy to clean up with just soap and water, but I’ve had a lot of experience with tackiness as mentioned in the intro of this post. Since doing my research, I’ve switched to Mod Podge Hard.
What Type of Brush Should I use to Make Ceramic Tile Coasters?
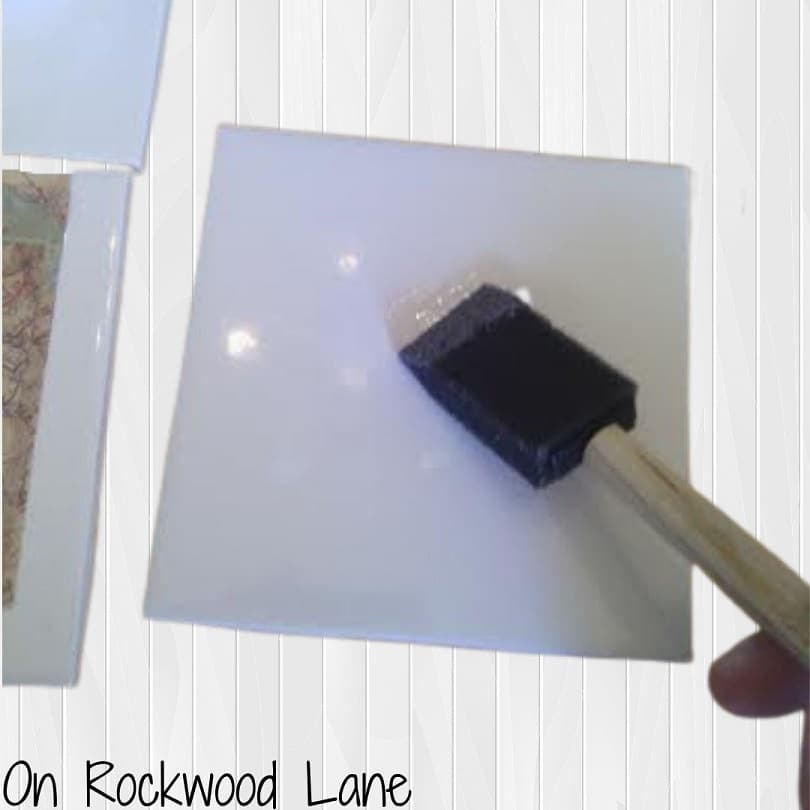
I recommend 1″ foam brushes. They fit into the Mod Podge container well, and are great for coverage on the tiles. I usually purchase a pack of 12 for $3.
Can I Reuse Foam Brushes for Future Ceramic Tile Coasters?
Absolutely! I recommend cleaning the brush immediately after applying the Mod Podge to the last coaster. Since you will need to do several coats of the Mod Podge, you will need to rinse off your foam brush several times as well.
I find that the hose on my kitchen sink and warm water work the best. While Mod Podge is non-toxic, it is not food safe so I recommend making sure there aren’t any dishes sitting around in the sink as you clean your brushes.
When I’m done cleaning off my foam brush, I sit it in an old green bean can to dry.
When the foam brushes are behind a simple cleaning, I toss them and grab a new one from the pack. Easy peasy.
How Do I Get the Bubbles Out From Under my Scrapbook Paper?
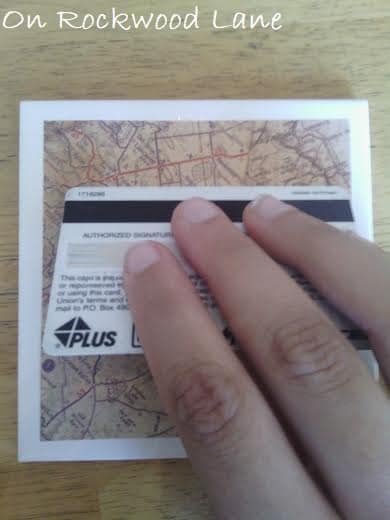
After the first coat of Mod Podge on my tile, I place down the scrapbook paper square and then use an old gift card to scrap across it to squeeze out all the bubbles.
What Kind of Sealer Should I Use on my Ceramic Tile Coaster?
Previously, I used Krylon Clear Crystal Acrylic Coating. I would buy it at JoAnn’s. It worked well, but I couldn’t get over the tackiness of the Mod Podge even with this coating on top.
I’ve read that Minwax Polycrylic is a good sealer for coasters, as well as VHT Engine Enamel. VHT Engine Enamel can be found at the auto parts store, and protects against heat. In my experience, a coffee cup is not hot enough to melt the Mod Podge so I dismiss that for coasters, but for a trivet that would see hot pans, I would definitely use that.
When I went to the store looking at sealers, I did not like that the Minwax Polycrylic was in a can that needed to be applied by brush. It may not seem like much, but it’s just enough to make me dread sealing the coasters, so I actually picked up a spray can of Krylon Clear Polyurethane instead.
I found that the Minwax Polycrylic spoke as if it was specific to wood projects, and I liked that the Clear Polyurethane has a list of materials including ceramic plus I’m more familiar with Polyurethane, but I didn’t know it came in spray form so I’m pretty excited about that.
What Can I Apply to the Bottom of my Ceramic Tile Coaster to Protect my Table?
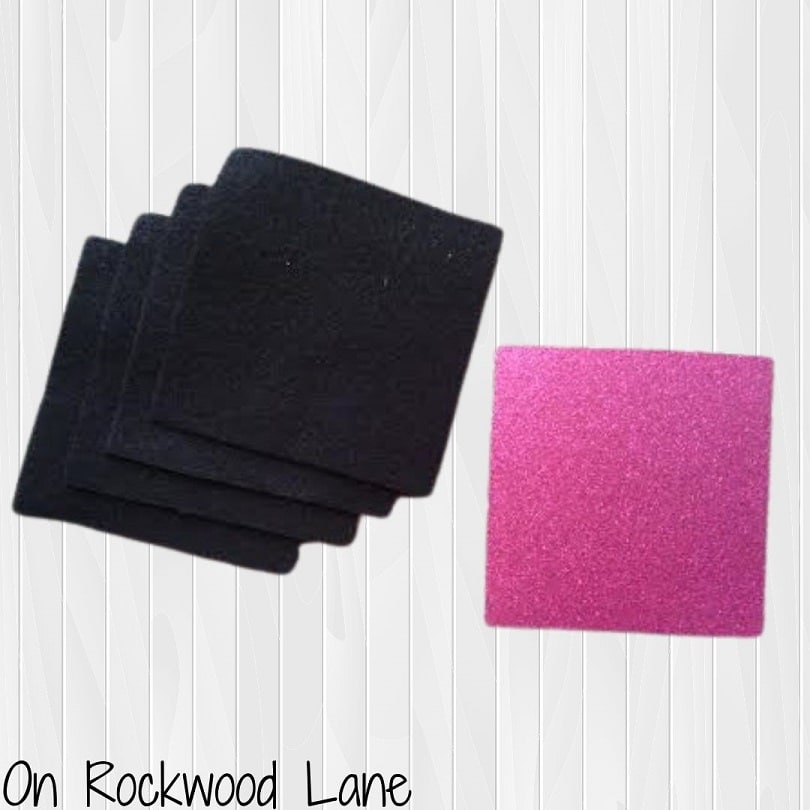
I buy black felt sheets 4 for $1 from Hobby Lobby or Walmart, cut them to size and hot glue them on the back of the coasters.
JoAnn’s sells felt at a good price too, but I find that the ones from Hobby Lobby and Walmart are a tad bit bigger so I can cut 6 squares from one sheet, whereas I can only get 4 squares from the sheets at JoAnn’s. You can also buy felt by the yard.
Cork sheets are a great alternatives and available at your local home improvement store. You may also find pre-cut squares or small sheets in your local craft store.
You will need one mini glue stick per coaster plus one to two more to glue any loose pieces of felt/cork down.
What Can I Use to Smooth Out the Rough Edges of my Ceramic Tile Coaster?
I do not sand down anything, but you can use sand paper to sand the edges of your tiles.
Now that you have all your supplies, hop on over to the tutorial to make your ceramic tile coasters.
Join one of my awesome Facebook groups to share your creations, and see what others are up to!
– EyeLoveKnots Crochet & DIY Community
– DIY Home On Rockwood Lane
– Alexandra Lane Lifestyle
Linked Up To…
Sundays on Silverado #85 – The House on Silverado
Beautifully Made Link Party for Home Decor 207 – Across the Blvd
Tuesday Turn About #143 – My Wee Abode
Home Matters Linky Party #372 – Modern on Monticello
Friday with Friends Link Party – My Hubbard Home
Farmhouse Friday 246 – County Road 407
All About Home #136 – Common Ground
New Upcycled Projects to Make 620 – Funky Junk Interiors
Handmade Monday #271 – Sum of their Stories
Craftastic Monday – Sew Can Do
Craft Schooling Sunday – Creative Jewish Mom
Happiness is Homemade Link Party #419 – Decor Craft Design
You’re the Star Blog Hop – Decor Craft Design
Share the Wealth Link Up #15 – Big Fat Menopausal Life
The Really Crafty Link Party #308 – Keeping it Real
Link-Up Potpourri #36 – My Bijou Life
Hello Monday – Pink Lady
Anything Goes Linky #324 – My Random Musings
630th Inspire Me Tuesday – A Stroll Thru Life
Fabulous Party 416 – Lou Lou Girls
Link-Up – Scribbling Boomer
The Happy Now Blog Link-Up #313 – JENerally Informed
Spread the Kindness Link Up #267 – Shelbee on the Edge
Team Creative Crafts Link Party #86 – Artsy-Fartsy Mama
The Wednesday Link Party 443 – Oombawka Design Crochet
Wonderful Wednesday – Oh My Heartsie Girl
Wonderful Wednesday Blog Hop – My Life Abundant
Thursday Favorite Things #533 – An Artful Mom
Creatively Crafty Link Party #320 – Try It – Like It – Create It
Encouraging Hearts & Home Blog Hop – My Slices of Life
Grace at Home No. 461 – Imparting Grace
Karins Kottage Linky Party #263 – Karins Kottage
Traffic Jam Weekend Link Party #316 – My Bijou Life
Create, Bake, Grow & Gather Party #512 – Shabby Art Boutique
Funtastic Friday Link Party #370 – Simply Beautiful by Angela
Morning Cup of Joe – The Cottage Market
Saturday Sparks Link Party 507 – Pieced Pastimes
Such a cute idea- thanks for linking up!
Thanks for these tips and suggestions! Have a great day!
xoxo
Lovely
http://www.mynameislovely.com
You too!!
These would make the cutest Mother’s Day or Father’s Day gifts! Thanks for sharing this!
Yes, definitely! Especially with some photos on them.
Great instructions – and I love the bunnies! Thanks for sharing at My Big Fat Menopausal LIfe’s Share the Wealth party. Hope the rest of your week is fabulous!
Thanks, Helen! That was a fun project!
That is a lovely gift! Now I need to be creative!
Tile coasters make the cutest gifts! Thanks for sharing!
Jill – Doused in Pink
Definitely. Thank YOU!
Well, how cute are these? And so easy too. I love a good simple, and budget-friendly craft. Thanks so much for sharing!
Definitely! I enjoy making these so much!
Hi,
I love you page, so much knowledge in here.
I have a question. I want to print on a transparent paper and then apply it to some tile coasters with Mod Podge. Do you know what paper I can use? I tried 90gsm tracing paper and it was a complete failure.
Thanks in advance
Hi Madge! I’m not sure about transparent paper, but I have made invitations on vellum before, and had a positive experience. There are so many types so perhaps you can find one that fits what you’re looking for – I think it would Mod Podge nicely.
A friend made coasters with regular Modge Podge and they are sticking to hot mugs and leaving a ring mark. I think it from the Modge Podge but she also applied spray polyurethane. Do you have any recommendations on how to remove these without damaging the paper? I was thinking fine sandpaper very carefully?
Sorry for the delay, Carol! I have not tried anything like this myself, but I did recently order some polymer clay needle minders that due to the sealer used, when the magnet was pulled apart, the sealer flaked off with it. The seller took them back, applied a different sealer over top of them, and now they are good as new. Perhaps a different sealer might help with the coasters.