10 things to do when you start a new blog!
So you just hit publish on your new blog, now what?
I just created my third blog, TunisianCrochetPatterns.com, and thought while I was doing all these things, it would be good to talk about them. Do them in whatever order is convenient for you.
#1 – First Blog Post
You can create a new blog post, and delete the one that automatically comes with the blog, or just edit the post, which is what I did.
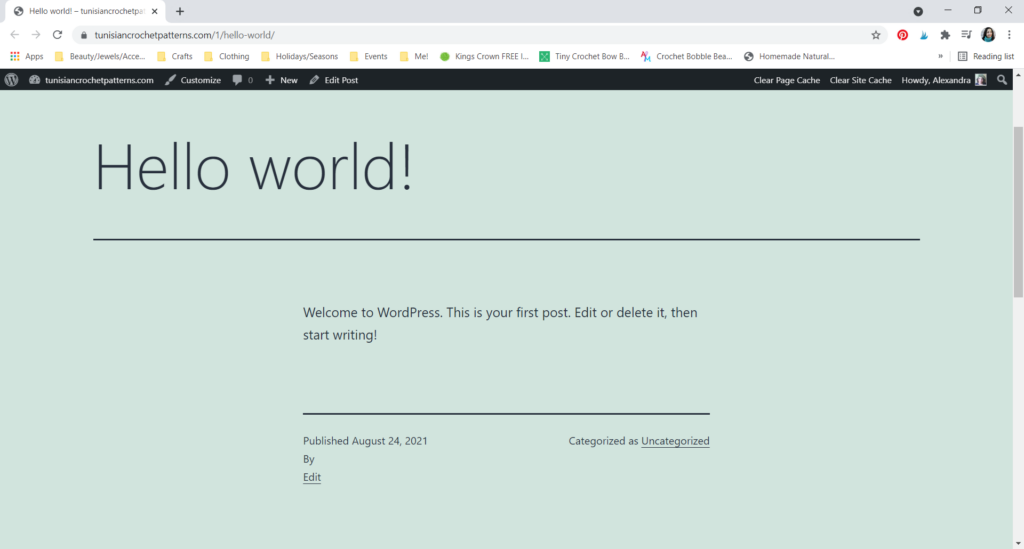
This is what it looked like on my new blog before I started editing.
You can do this one of two ways: (1) Take this time to introduce yourself, speak about what inspired you to create this blog, why you chose the name that you did, what your intentions are for the blog, what your interests are, etc; (2) Start with your first article, recipe, tutorial, etc.
I have started all 3 of mine with an intro post, which I’ll link below, and I do this because I feel like I’m connecting better with readers, and it marks the official start of my blog, but you can just get right onto whatever post fits your niche best, and Google will really like you for that.
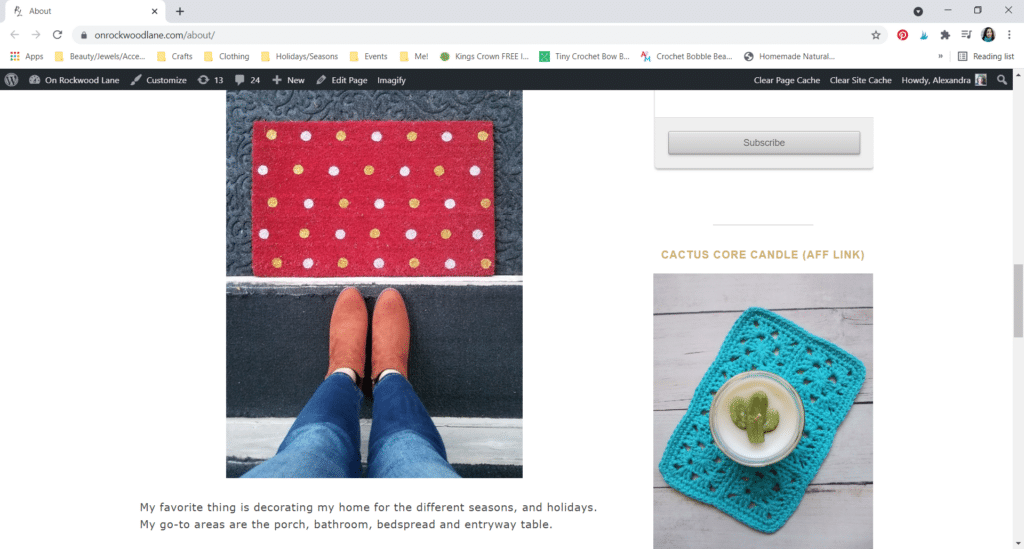
If you need some inspiration, you can check out my first post On Rockwood Lane, on EyeLoveKnots, and on Tunisian Crochet Patterns.
#2 – Make an About Me Section
I like to do my first post first, then come to the About Me because in the first post you speak more freely, and it’s easy to pull things from that to create your About Me.
Here On Rockwood Lane, my About Me is just copied and pasted of my first post, while my EyeLoveKnots About Me contains a little blurb about me, then a separate section about EyeLoveKnots, and then bio’s on each of my contributors.
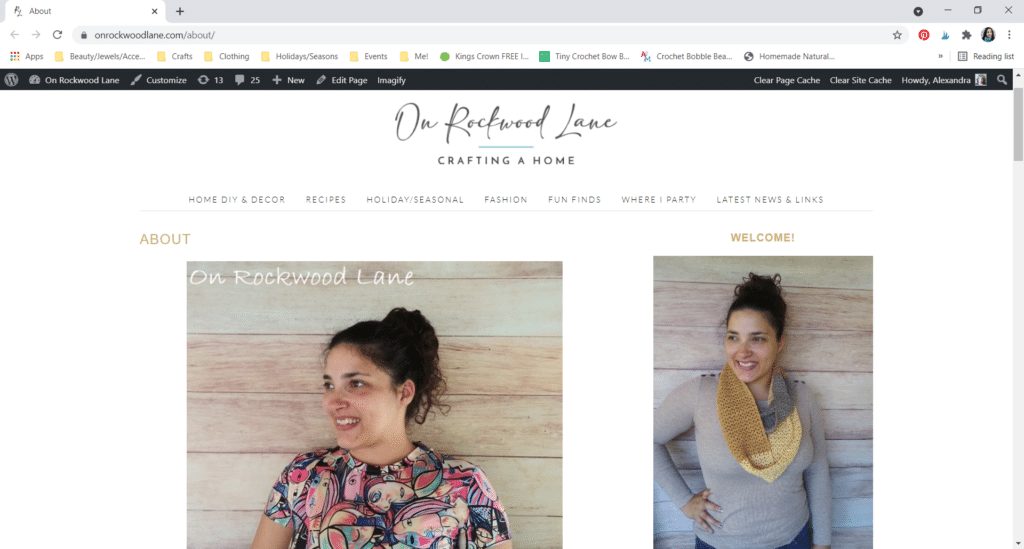
I recommend sharing a photo of yourself so your readers can connect with you better.
You can also put your contact information here, in case readers need to read out, or just add icons when you do your menus later on.
#3 – Privacy Policy and Cookie Notice
The GDPR, or General Data Protection Regulation, is a set of guidelines that requires you to be lawful, and transparent in what information is collected, and give readers the option to opt out of being tracked by cookies. It’s focus is for the individuals who live in the European Union (EU), but everyone can really benefit from this. You can also be fined for not having a privacy policy and cookie notice.
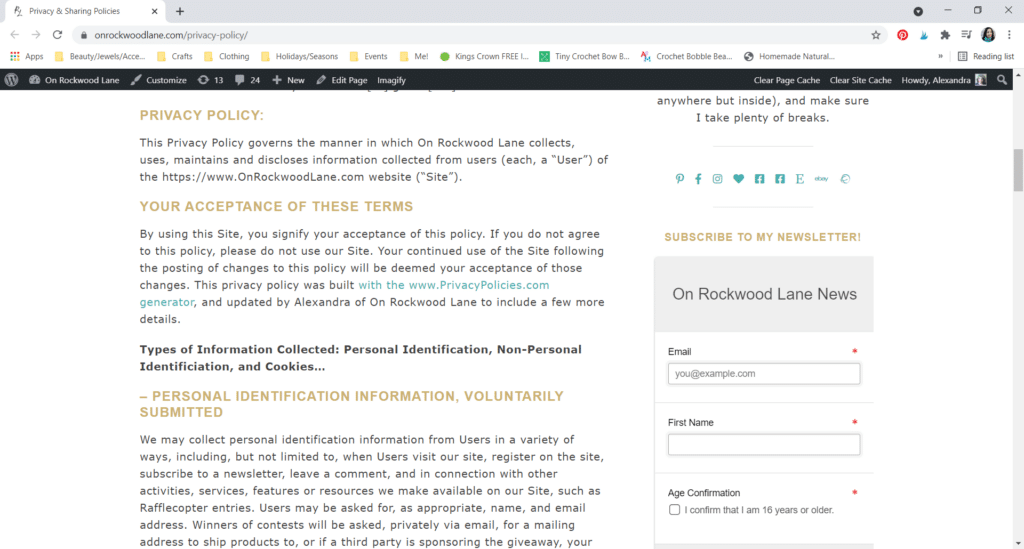
The first thing I did was create a page with my Privacy Policy. I used the site Privacy Policy to generate the basic policy – I paid for this, and then I went through and added my own information to be more transparent.
Things I added:
- All services I use to run my blog, like MadMimi for newsletters, InLinkz for link up parties, Rafflecopter for giveaways, etc.
- All affiliate programs that I am a part of and link to in blog posts, like Amazon, Color Street, Etsy, etc.
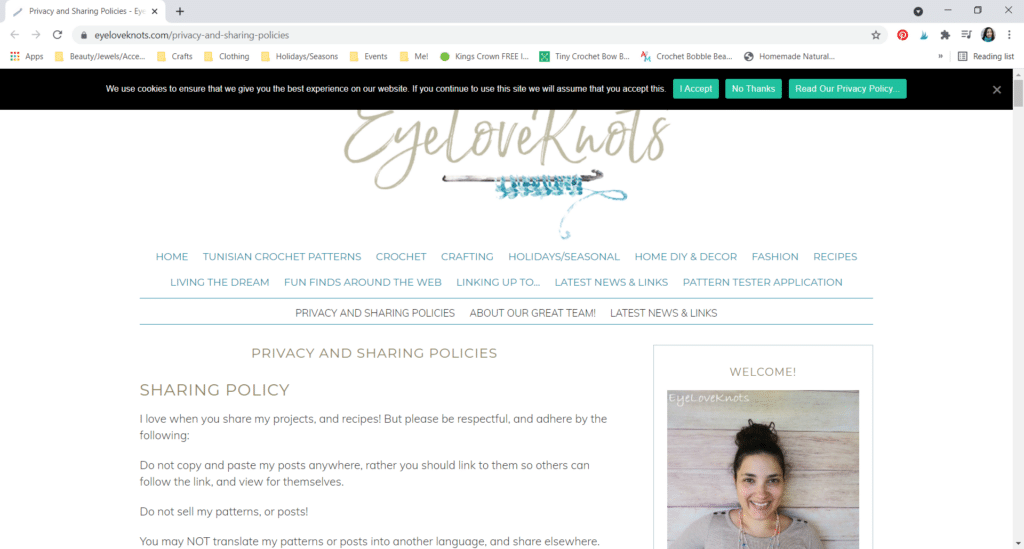
Then I added my cookie notice. On WordPress, I use the Cookie Notice & Compliance for GDPR / CCPA plug-in to create/display this bar. You can see it here on my EyeLoveKnots blog near my logo. In this notice, provide a link to your privacy policy so readers can look into it further if they need to.
#4 – Sharing Policy
On the same page as my Privacy Policy, I share my Sharing Policy – I put it on the page first.
While we all know about copyright, not everyone knows how it works or sharing etiquette. The Sharing Policy is just a friendly reminder of copyright rules, and it’s how you want readers and other bloggers to share your posts and photos. Here is some things to consider:
- Remind readers that they are not allowed to copy and paste any of your posts, but rather they should link to your post instead.
- Remind readers that they are not allowed to sell your posts, DIYs, etc.
- Share how you feel about having your posts translated into other languages – my policy is that this is not allowed, but I welcome it for contributor posts on my blog.
- Share how many photos and which ones readers are allowed to share – my policy says one photo, and none of my process. Some say that readers are not allowed to share photos of their family.
- Remind readers that they must provide a link back to your post that they are sharing from.
- Designer credit… Encourage readers to share the photos of the items they create with your posts, and mention you as the designer. This is not a requirement – you cannot require them to mention you when they share their items, but encourage them to so other readers know where to go if they want to see how to make one themselves. In this same breath, you cannot forbid makers from selling items they make using your instructions. Copyright prohibits them from selling your instructions, but not the items they create – they are free to sell anything they create with their own hands even if you say they cannot.
#5 – Create Your Social Media Pages
If you haven’t yet, go ahead and create your social media pages for your new blog. Some examples include Facebook page, Facebook group, Instagram, YouTube, Twitter, TikTok, Pinterest, etc.
It can be quite overwhelming because you also have to manage them. The short answer is, you do not have to be on everything, but the more you are on, the better your chances for being seen because not everyone is on (for example) Facebook.
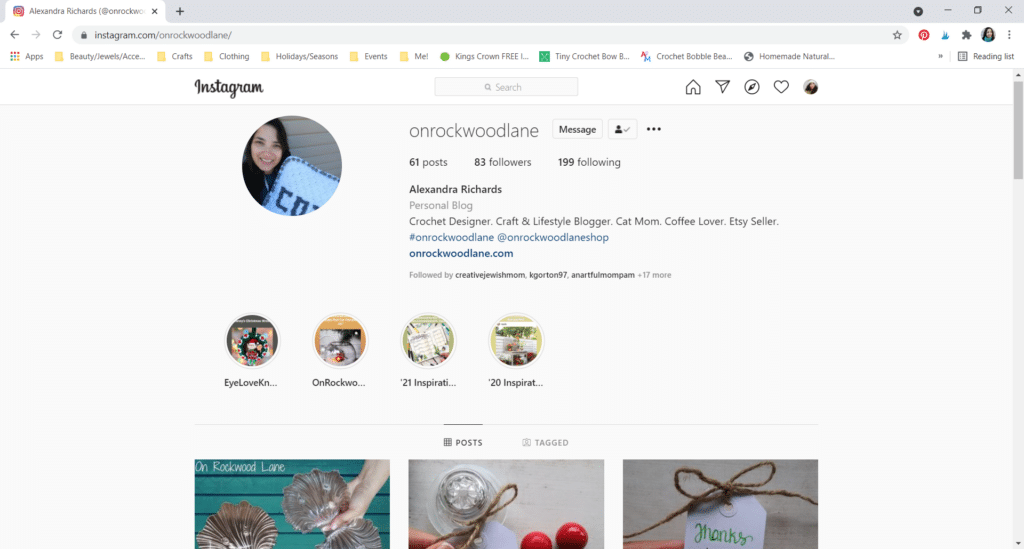
I recommend at least doing an Instagram, a Facebook page and Pinterest account.
Remember when creating these pages, you want them to be a name that is close to your blog name so when readers are looking for you, they can find you easily.
#6 – Side Toolbar
The side toolbar is a great spot for you to put things that don’t really fit in your menus, but you want readers to have quick and easy access to, or for promoting.
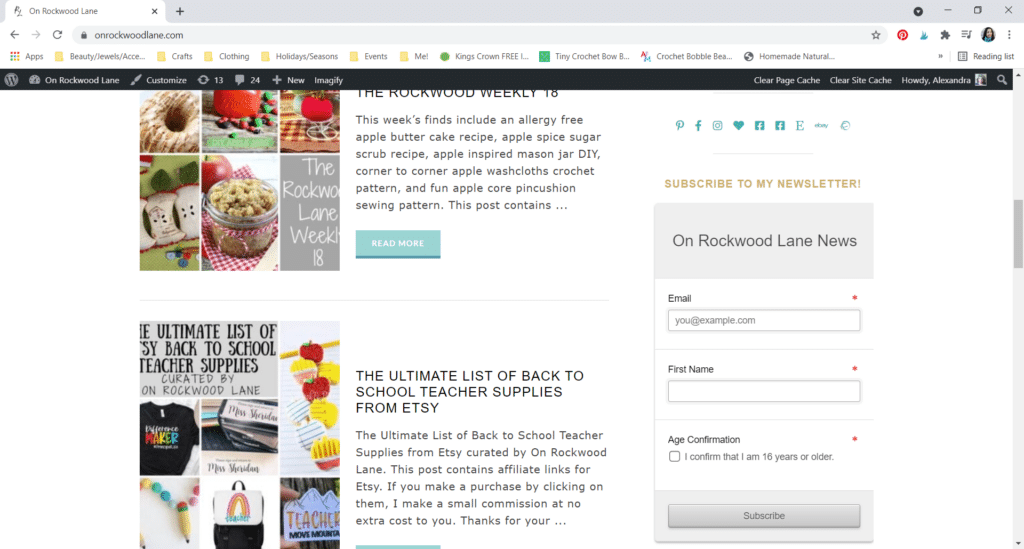
You saw above that I have my photo, and under it is a blurb about myself. Under that is my social media icons, and then my newsletter box.
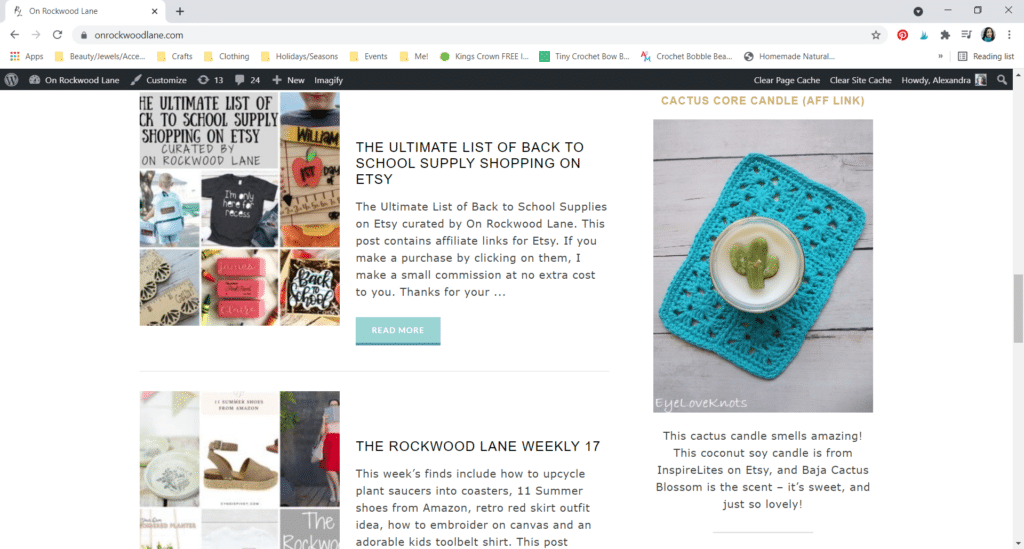
Under my newsletter I have a couple affiliate links.
#7 – Have a Newsletter Option
It’s so important to have a newsletter option for readers. There are way too many blogs out there now for readers to just remember to go back and visit, and with social media outlets changes their algorithms, you want to make sure you make it easy for readers to subscribe.
Newsletters are also great for running sales, sharing affiliate links and newsletter exclusives, sharing oldie but goodie posts from the blog and just overall connecting with your readers and bringing extra, consistent traffic to your blog.
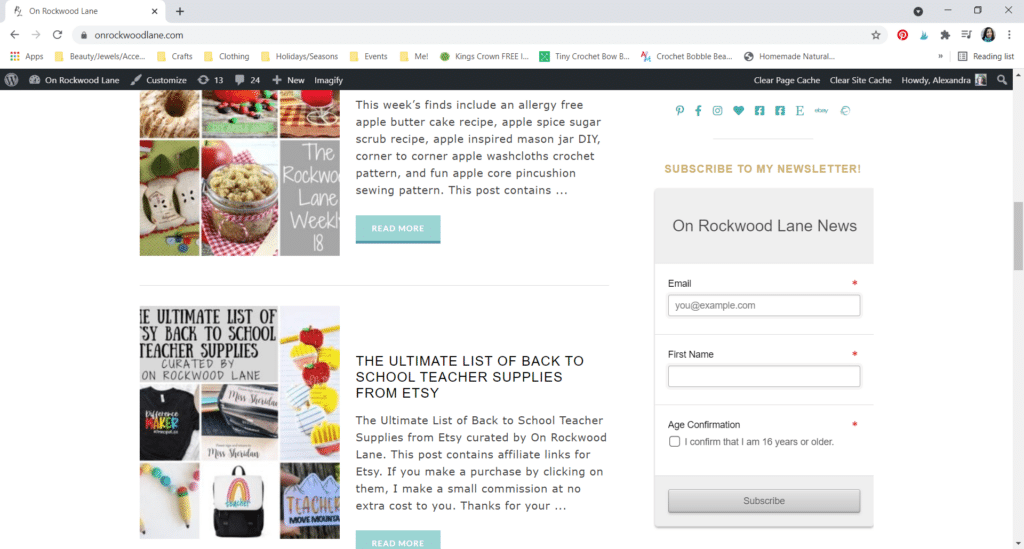
Also, make sure your newsletter box is easy to find. I put mine right on the side toolbar close to the top, but you can also make a button on your menu for it, put it down at the footer of the blog, use a plug in to insert it into blog posts or use a plug in to make a box that pops up when a reader visits (though I find these to be annoying as a reader).
#8 – Add Your Blog to BlogLovin’, and Add the Link
BlogLovin’ is a really neat platform that makes it really easy to follow just the blogs you want to. It reminds me kind of like a Facebook feed, but of only the blogs you subscribe to, so, so much easier to find the posts you want to see, and you can save posts in collections that you create to view later.
I use it to subscribe to the blogs that don’t have newsletter services, or send newsletters without photos (I hate that!).
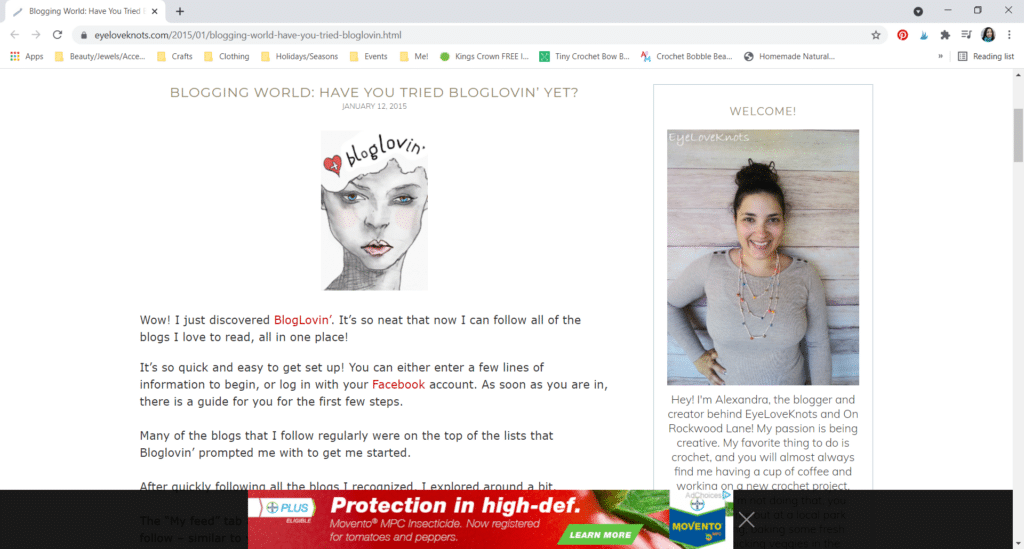
When I added my EyeLoveKnots blog to it back in 2015, I created a whole post on what BlogLovin’ was, but for my more recent On Rockwood Lane blog, I just added the link into my first post.
You have to insert the link somewhere in a post to claim the blog as yours on BlogLovin’.
#9 – Add Easy to Navigate Menus on your Blog with Social Media Links
You want all of your menus to be easy to navigate, and as clean as possible. If it looks cluttered, or it’s difficult for readers to use, they will bail.
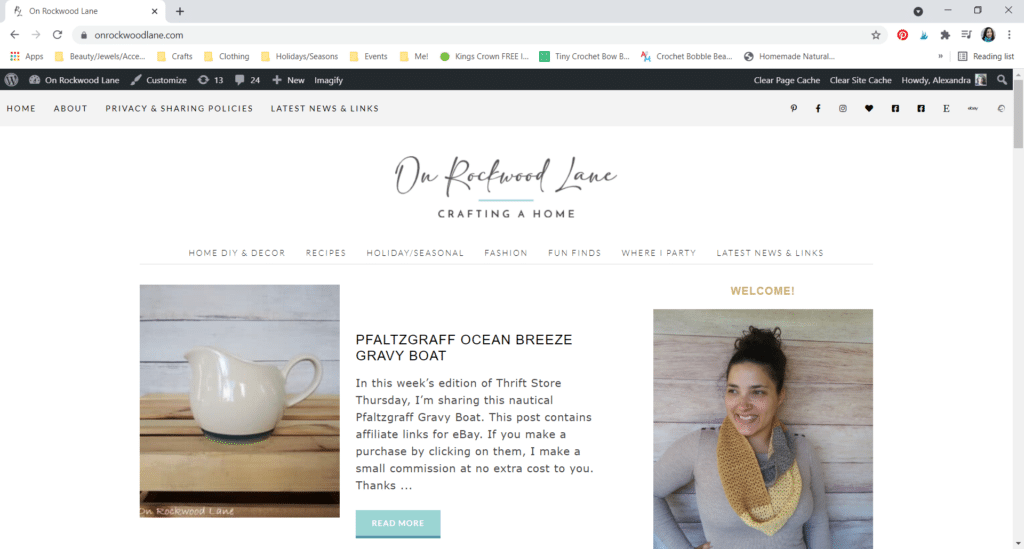
Here is how my two menus looks here On Rockwood Lane. At the top of the page, you see “HOME ABOUT PRIVACY…”, and then under the logo, you see “HOME DIY & DECOR RECIPES…” I wanted the top to be non post related, and under the logo to be everything post related. I had this set up when I had my blog designed.
When I made my third blog, I picked the theme myself, and it only supports one menu, so I don’t have it separated like this on my newest blog – in this case, I just have my one menu at the top…
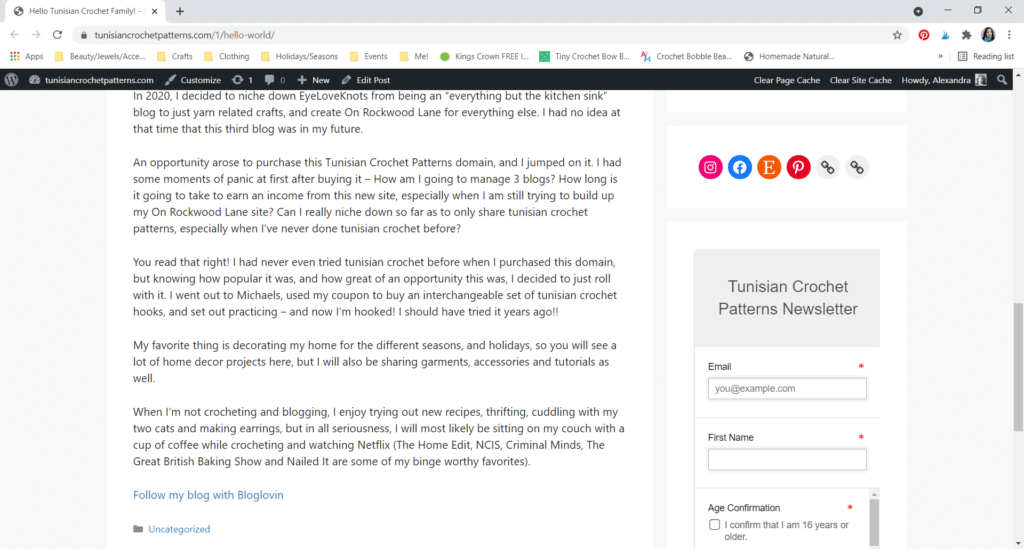
… and the social icons are on the right side toolbar under my photo made with a widget option, not a menu.
As far as social media outlets go, you want all of yours to be easy to find by readers so they can check it out, and follow you without really having to search/guess if you are on that platform. I also want to point out that if you do not have a contact page, you can put an email icon here for readers.
For the EyeLoveKnots and On Rockwood Lane where I was able to use menu options, I use the free version of Font Awesome to pick my icons. You don’t have to create an account to use it for free, you just pick the icons you want – the grayed out ones are only available for the paid version.
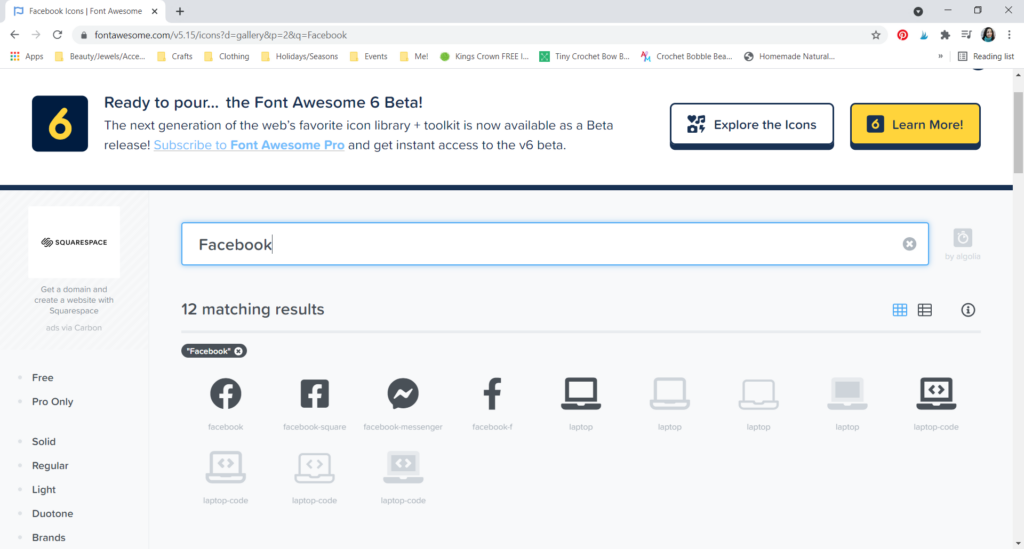
I’ll show a quick example for Facebook. I simply typed in “Facebook” in the search bar, and these options popped up.
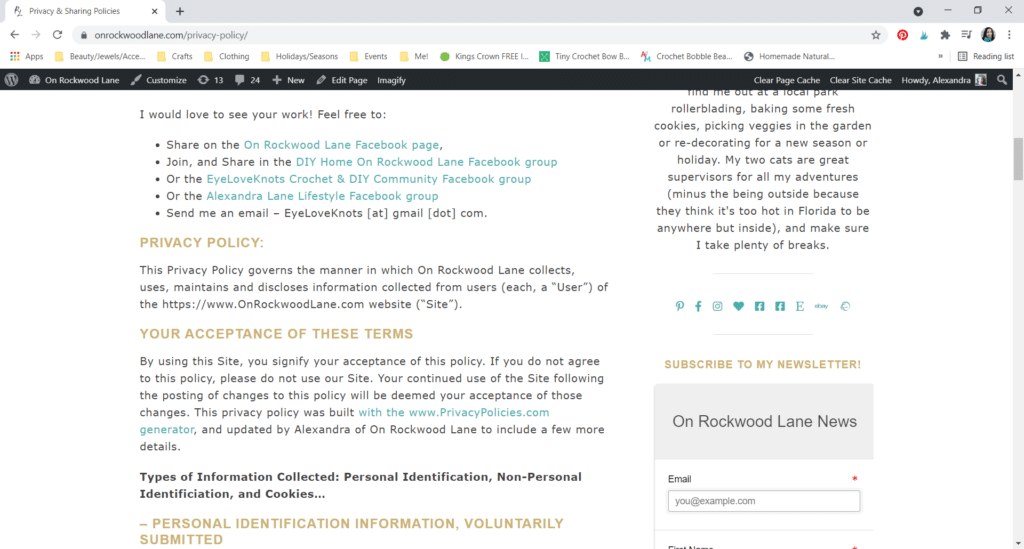
Here on the right side toolbar you will see that I picked two different Facebook icons – one for my page, and a different one for my groups.
#10 – Let Google Know Your Blog Exists!
This one is a little more involved, and that’s why I left it for last.
Google Console is a free tool where you will go to register your URL so Google knows it exists, and will include it in Google searches, and it also provides you with valuable information about your blog, such as traffic figures, how well it performs including load speed, the phrases/terms readers use in Google that makes your blog pop up for them to click on, etc, and helps you monitor website performance, and spot any issues that need addressing.
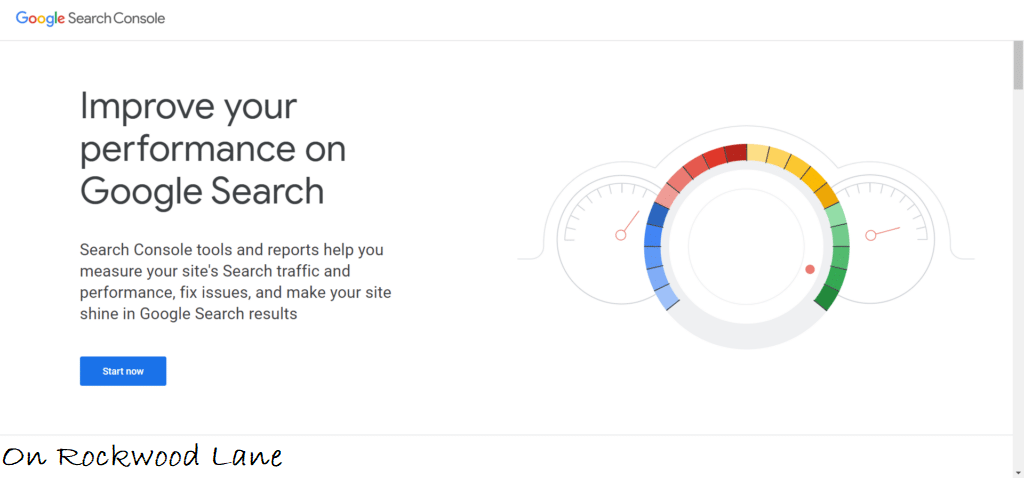
First thing, head on over to the Google Search Console home page, and Start Now.
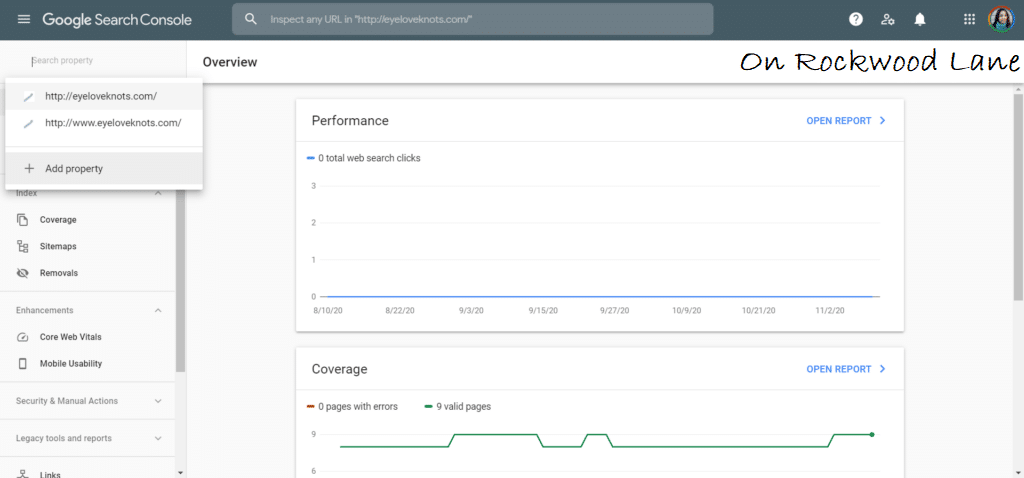
In the top left corner, you will click “Search Console”, and the select “Add Property” from the drop down box.
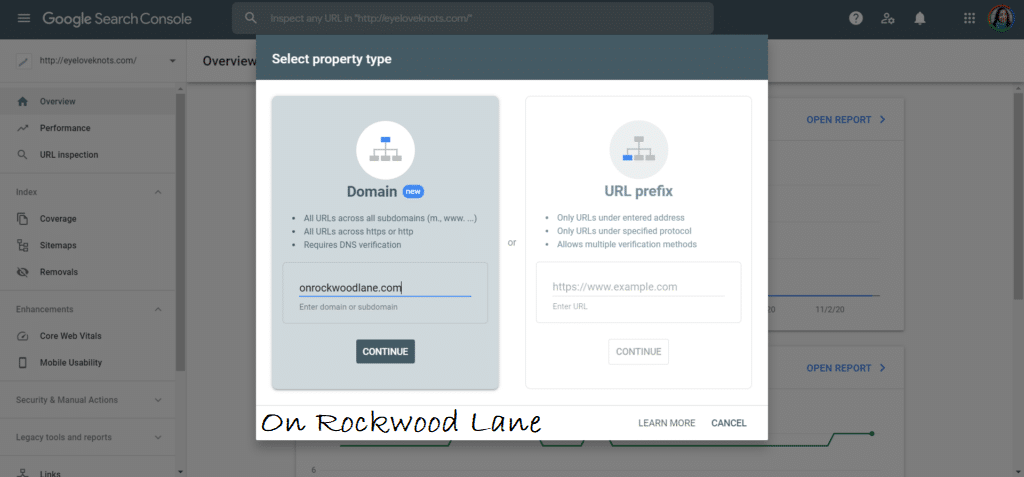
You will “Add Property”, and this page pops up.
I tried Option 1: Using the box on the left, you can type in just your domain name (onrockwoodlane.com without the “www” in the beginning or “https”, etc), and it will automatically connect all associated pages for you.
This option is new. Before, we only had the option on the right, and used to have to add several versions of the site for Google to recognize that they all belonged to the same blog (because people type it into their browser different ways).
This way requires you to sign into your account for your domain host (I use Hover), copy code provided by the Google Search Console, and paste into the DNS configuration -> select your domain, then DNS, then Add Record. Select TXT as the type, the host name is your subdomain (I used onrockwoodlane.com), then paste the code from the Google Search Console into the Content box, and then click Add Record. I tried this method, but I got this message “This domain is using third-party nameservers. DNS records added here won’t have an effect.” so I took that to mean that whatever I added, it wouldn’t work to verify.
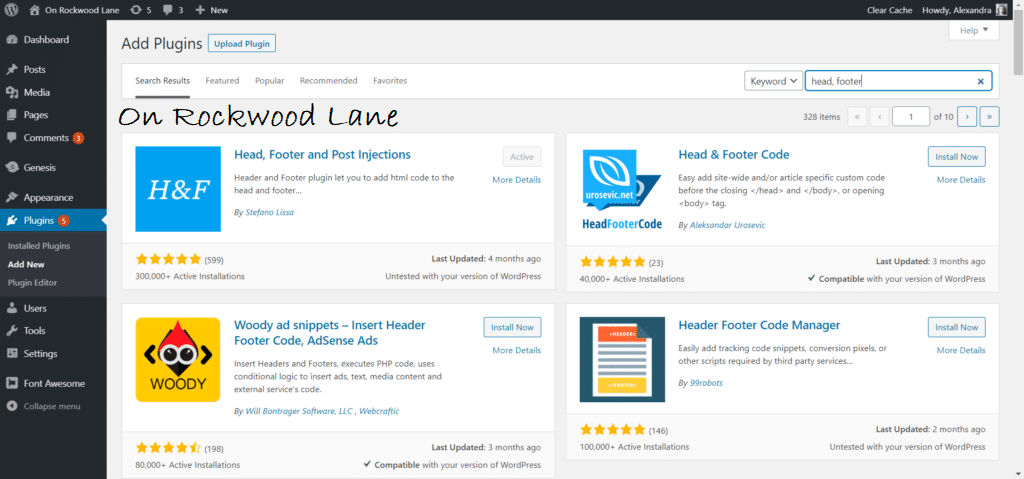
Option 2 has several different verification methods. I went with the HTML option using the Head, Footer and Post Injections Plugin to put the HTML for me. I use this plugin because it completely takes the guess work out of the placing the code myself because leave it to me, and I will probably mess something up.
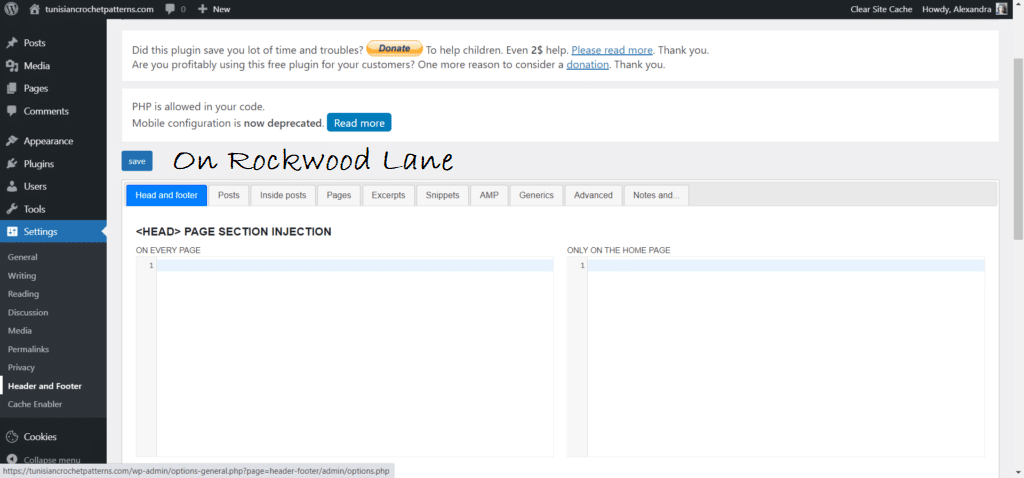
After you hit Activate, then go down to your Settings tab, and click on Header and Footer.
Copy the HTML tag code, paste it into that left “Head” box, and hit Save.
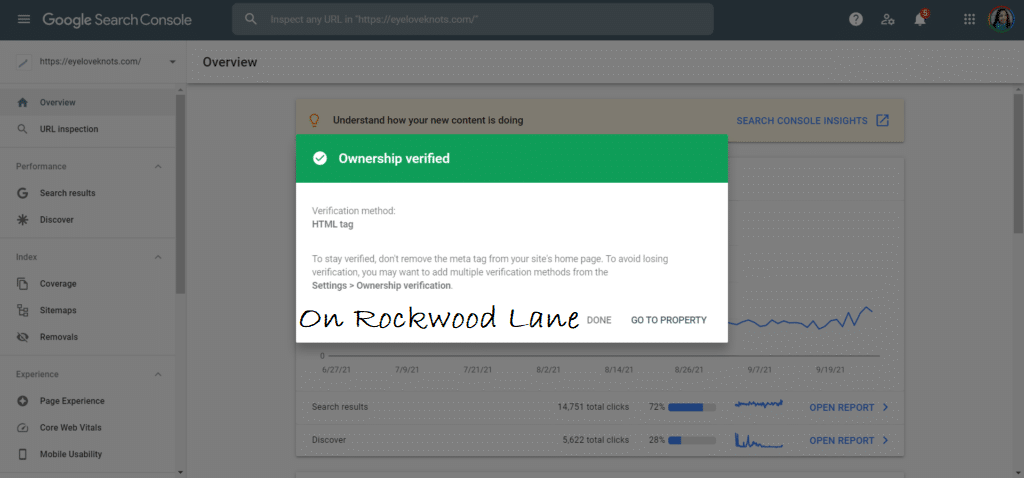
Lastly, click Verify on the Google Search Console, and it should give you a happy message that your ownership has been verified.

Join one of my awesome Facebook groups to share your creations, and see what others are up to!
– EyeLoveKnots Crochet & DIY Community
– DIY Home On Rockwood Lane
– Alexandra Lane Lifestyle
Linked Up To…
Home Matters Linky Party #353 – Modern on Monticello
Create, Bake, Grow & Gather Party #491 – Shabby Art Boutique
Share the Wealth Link Party #5 – Big Fat Menopausal Life
The Wednesday Link Party 421 – Oombawka Design
{Wow Me} Wednesday #527 – Ginger Snap Crafts
Party in Your PJs #381 – The Apple Street Cottage
Craft Schooling Sunday – Creative Jewish Mom
Happiness is Homemade Link Party #397 – Decor Craft Design
Handmade Monday #250 – Sum of their Stories
The Really Crafty Link Party #286 – Keeping it Real
Craftastic Monday Link Party – Sew Can Do
Creatively Crafty Link Party #298 – Life Beyond the Kitchen
Saturday Sparks Link Party #445 – Pieced Pastimes
Link Your Stuff – Annemarie’s Haakblog
You’re the Star Blog Hop – Decor Craft Design
Unlimited Link Party 36 – Grammy’s Grid
Heart and Soul Link Party – April, the 21st Century Housewife
Link Up Potpourri #14 – My Bijou Life
610th Inspire Me Tuesday – A Stroll Thru Life
Fabulous Party 394 – Lou Lou Girls
Wonderful Wednesday – Oh My Heartsie Girl
Spread the Kindness Link Up #245 – Shelbee on the Edge
Thursday Favorite Things #512 – An Artful Mom
Grace at Home No. 443 – Imparting Grace
Encouraging Hearts & Home – Slices of Life
Traffic Jam Weekend Link Party #299 – My Bijou Life
Funtastic Friday Link Party #355 – Simply Beautiful by Angela
A Morning Cup of Joe – The Cottage Market
Thanks so much for sharing these tips. I’ve pinned them for later.
So happy to share! Glad you found them helpful.
GREAT information!! I had to figure all this out hit or miss. Love the support to fellow bloggers. Thanks for sharing the My Big Fat Menopausal Life’s Share the Wealth Party – Have a fabulous weekend!
Thank you for this! I know it is a different kind of post than what you usually share but the timing is perfect for me. I am in the process of planning a second website for my design business and I had forgotten about a lot of the steps I did so long ago. I will be referring back to this post in the next month. Thanks for sharing it! #HomeMattersParty
You are not alone! I forgot many when I created this second blog, and when I started the third, I thought this is my last opportunity to note this stuff down. Can’t wait to see your new site!